Complete AI Pack for WordPress
AI Power is the most powerful WordPress ChatGPT plugin, leveraging GPT-4 by OpenAI, to generate high-quality content.
AI Power is a comprehensive AI plugin for WordPress that uses advanced technologies like GPT-3.5, GPT-4, GPT-4o, Gemini Pro, Mistral, Llama, Anthropic and more to generate customizable content, images, forms, and more. Its features include an AI-powered Content Writer, Image Generator, ChatGPT for chatbot creation, WooCommerce integration, Embeddings, and more.
GPT 4
Qdrant
GPT 4o
ElevenLabs
Anthropic
Gemini Pro
Pinecone
Azure
What is AI Power?
AI Power is a ChatGPT plugin for WordPress. It uses advanced AI models like GPT-3.5 and GPT-4. It generates customizable content, images, and forms. Other features include Chat bots, Pexels, WooCommerce integration, Speech-to-Post Model Comparison Tool and more.
Your All-in-One AI Solution for WordPress
Experience the power of advanced natural language processing technology with AI Power. From content generation to custom chat bots, our plugin offers a range of features to enhance your WordPress site.
Automatic Content
Automatic Images
Custom ChatGPT
AI SEO Tools
AI Suggestions
Content Generation from RSS
Content Generation from Google Sheets
Fully Customizable AI Forms
WooCommerce Product Writer
Vector Databases (Pinecone, Qdrant)
Easy to Setup
Setting up AI Power is simple and easy. All you need to do is enter your OpenAI API key on the plugin settings page and you're ready to use all of the features.
Once your API key is entered, you can start generating content, using the title suggestion tool, converting audio to text, utilizing the semantic search feature, and comparing different GPT models. No complicated installation process or technical knowledge is required.
Clean, & Simple User Interface
AI Power offers you a clean and simple user interface that allows you to access all the functions of the WordPress plugin from a single control panel.
The minimalistic design ensures that users can quickly locate the options they need without being overwhelmed by unnecessary clutter. The interface also features helpful tooltips and clear labels to guide users through the plugin’s functionalities.
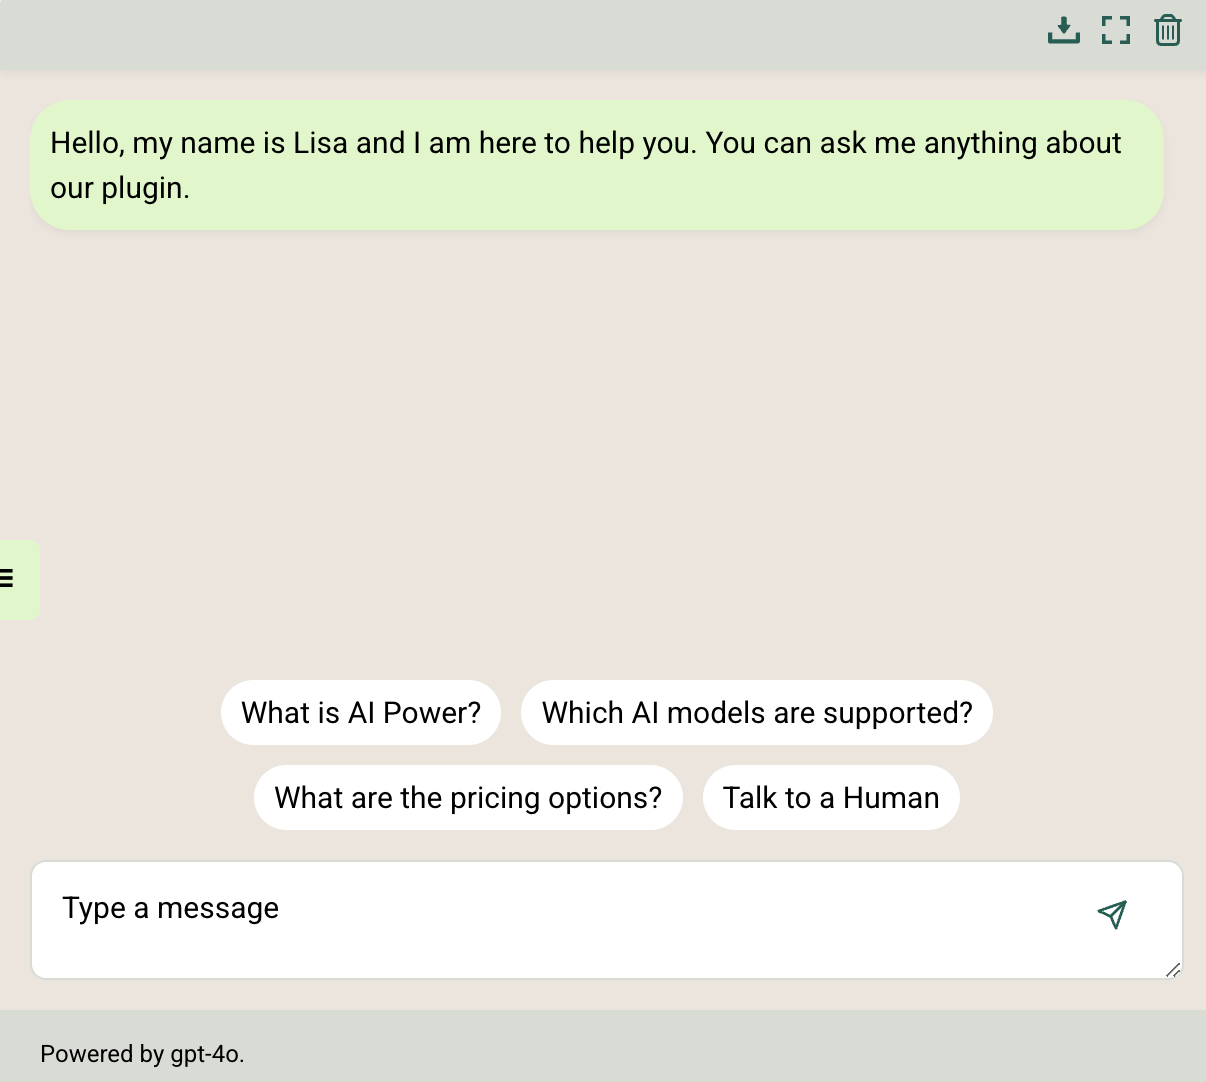
Get Excellent Assistance with Our AI Chatbot, Lisa.
Our ChatGPT-powered chatbot, Lisa, offers exceptional support to our users. Whether you have questions or issues, Lisa is always ready to assist you with her smart and friendly nature.
Lisa can answer your queries, provide tips and suggestions, and guide you through the plugin features. Lisa is easily accessible from the chat widget on our website, making it convenient for you to get the support you need.
Happy Users
GPT AI Power makes it easy to generate high-quality, engaging content.
4.7 Overall Satisfaction Rating!
Generate High Quality Content with One Click
The Content Writer module is an innovative and powerful feature of the AI Power WordPress plugin, designed to generate high-quality content using GPT models. With its user-friendly interface and extensive customization options, this module is perfect for content creators who want to streamline their writing process while maintaining control over the final output.
The Content Writer module consists of two distinct sections: Custom and Express Mode.
Custom mode allows you to create content with more control over the prompts, letting you tailor the AI-generated output to your specific needs. This mode is perfect for users who want to fine-tune their content while still benefiting from the time-saving advantages of AI.
Express mode is designed to simplify content generation by providing a quick and easy way to create content with just a single click. By default, Express mode generates a 500-word article with five headings, but these settings can be adjusted to suit your preferences.
Key Features of Express mode:
- Supports 41 languages
- Offers 44 writing styles and 24 tones
- Customizable number of headings (1-15)
- Adjustable heading tags (H1-H6)
- Option to modify headings before generating content
- Ability to add introductions, conclusions, and taglines
- Table of Contents generation
- Anchor text and Call-to-Action support
- Integration with OpenAI’s DALL-E and Pexels for image insertion
- Integration with Yoast SEO, Rank Math and All In One SEO
Maximize Content Creation with Auto Content Writer
One of the key modules of this plugin is the Auto Content Writer. This powerful tool automates the process of generating content and has several features that make it an essential resource for content creators.
Before using the Auto Content Writer, it is necessary to set up a Cron Job on the server level. This allows the plugin to automate tasks and run the bulk feature at specific times or intervals.
The Auto Content Writer module includes a Bulk Editor, which enables users to create multiple articles simultaneously. To use this feature, users should navigate to the Bulk Editor tab, input the desired title, choose the content settings, and click “Generate”. The progress of the content creation can be monitored in the “Queue” tab.
Another useful feature of the Auto Content Writer is the CSV Import. Users can upload a CSV file containing the title value for each line, and the plugin will generate content accordingly.
The Copy-Paste feature allows users to paste their content into a text area, after which the plugin will generate content based on the pasted text.
The Queue feature in the Auto Content Writer module helps users keep track of the progress of their content creation. Users can view information about each batch of content, such as its status, source, duration, token usage, word count, and estimated cost. Batches can also be deleted if they are no longer needed.
Additional settings include the Force Refresh button, which restarts the Cron Job when necessary, and options to restart failed jobs automatically after a specific amount of time or attempts. These settings ensure that the content generation process runs smoothly and efficiently.
Finally, the Auto Content Writer module offers a scheduling feature for Pro users. This allows users to specify a specific date and time for publishing their generated content, ensuring that it is published at the optimal time for their audience without manual intervention.
Automatically Generate Meta Descriptions with GPT AI Power Plugin
One of the plugin’s most useful features is its SEO optimizer module, which automates the process of creating meta descriptions for your content.
To get started with this feature, you can navigate to the plugin’s Settings → SEO tab. Here, you will find two checkboxes that you can enable to generate and include meta descriptions in your content.
By selecting the “Meta Descriptions” checkbox, the plugin will automatically generate a meta description for your content. This description will be visible under the SEO tab in the content writer page. You can also select the “Include in HTML” checkbox to insert the generated meta description directly into the HTML code of your post.
If you are already using another SEO plugin, such as Yoast SEO, All in One SEO, or Math Rank, you can integrate GPT AI Power with these plugins by enabling the corresponding checkbox under the Settings → SEO tab. This feature will automatically update the meta fields in the corresponding SEO plugin whenever a meta description is generated for your content.
For WooCommerce users, the plugin can also generate meta descriptions for your products, providing a hassle-free solution to optimize your e-commerce store’s SEO.
The generated meta descriptions are concise and provide a brief summary of the content of the page. For example, if your page is about mobile phones, the plugin might generate a meta description such as “Mobile phones are electronic devices that allow you to make calls, send text messages, and browse the internet.” This meta description will help search engines understand the content of your page and display an accurate snippet in the search results.
By automating the process of creating meta descriptions, GPT AI Power saves you time and effort, allowing you to focus on creating high-quality content for your website. Moreover, with its seamless integration with popular SEO plugins, the plugin ensures that your meta descriptions are consistent and optimized across all of your SEO tools.
Effortless AI-Generated Images
The GPT AI Power plugin for WordPress comes with an Image Generator module, utilizing the DALL-E and Stable Diffusion AI engines to create stunning images based on text prompts. This powerful module offers a variety of features to help you generate unique, artistically styled images tailored to your preferences.
Image Generation: Simply enter a text prompt in the Image Generator and click “Generate.” The AI will then create images based on the prompt. Select your favorite and save it to your WordPress Media Library.
DALL-E Features: Choose from image sizes of 256×256, 512×512, or 1024×1024. Generate up to 6 images per request.
Stable Diffusion Features: Choose image sizes from 128×128 to 1024×1024. Generate up to 2 images per request. Exclude words with a negative prompt. Adjust prompt strength, number of inference steps, and guidance scale.
Customization: Select from 40+ artists, 50+ art styles, 30+ photography styles, 50+ lightning styles, 10+ subjects, 40+ camera settings, 50+ composition styles, 7 resolutions, and 20+ color options to personalize your image.
Shortcodes: Easily display the image generator on posts or pages with provided shortcodes for DALL-E, Stable Diffusion, or both.
Price Handling: Control pricing for registered and non-registered users, set price limits, and reset limits after a specified interval.
Create Your Chatbot with Your Own Content Using ChatGPT
One of the most exciting features of this plugin is the custom ChatGPT module, which enables you to add a chatbot to your website easily. There are three methods to add a chatbot to your website: shortcode, widget, and wizard.
You can use the wizard to create your bot step by step. You can create unlimited bots with different settings, parameters, token limits, context, and more. The customization options for the ChatGPT module are extensive. You can change the language of the chatbot, change the tone, and change the act as of the chatbot. You can also customize the AI engine parameters of the chatbot, change the name of the AI and the user, and add context to the chatbot. We support WordPress Excerpt and Embeddings as a context.
In addition to these customization options, GPT AI Power also offers two different methods for embeddings. If you enable this option, the chatbot will be able to generate a response based on the content of your pages via embeddings. This feature requires Pinecone integration, which is an external long-term memory for the bot.
The chatbot module also provides several options for chat logs, style, voice input, and token handling. You can limit the number of tokens that the chatbot will use, customize the mic and stop button color, and set the notice that will be displayed to the user when the token limit is reached.
Another feature of ChatGPT is the Logs tab, where you can view and search through the logs of the chatbot. The logs contain information such as the unique session ID for each user, the date and time of their interaction with the chatbot, the user’s message, the chatbot’s AI response, the title of the page where the user is interacting with the chatbot, the source of the interaction (shortcode or widget), the user’s IP address, the number of tokens used for the conversation, the estimated cost of the conversation, whether the conversation was moderated or not, and the full conversation transcript.
In addition, you can moderate the chatbot to check whether the content complies with OpenAI’s usage policies. The chatbot can detect offensive words and content and will display a notice to the user if their message is flagged as potentially harmful or inappropriate.
AI Forms: The Ultimate Tool for Interactive Website Forms
The AI Forms module in our GPT AI Power WordPress plugin is an innovative solution that provides website owners with over 100 pre-built AI forms for their website. Additionally, it offers an intuitive interface to design and create your own forms with ease.
Using the pre-built forms is simple; you can search and browse through available options using keywords, category, or author. Once you find the desired template, you can simply copy the shortcode provided and embed it into your post or page where you want the form to appear. You can also customize the pre-built forms by clicking on the customize button.
Designing your own AI Forms is also an easy process using our intuitive interface. The Properties tab allows you to enter a title for your form, select a category, and add a sample response, which will be used to generate the prompt for your users. You can then choose from a variety of GPT models, customize the parameters for the model, and select an icon and form background color to match your website’s branding in the Style tab. In the Frontend tab, you can choose how and where to display the prompt result and notification text for non-registered users.
The most important tab is the Fields tab, where you can add as many fields as you want, including label, ID, type, minimum and maximum values, and options for drop-down lists. It is important to note that the fields must be in order for the prompt to work correctly.
Our AI Forms module also includes token handling, where you can set token limits for different user roles and non-registered users.
Overall, AI Forms is an excellent tool for website owners to add interactive and engaging forms to their website. With the option to use pre-built forms or create custom forms, and a range of customization options available, our AI Forms module is a valuable addition to any website looking to enhance user engagement and interactivity.
Explore Your Creativity with PromptBase: Your Ultimate Prompt Solution
PromptBase is a powerful and user-friendly feature of the GPT AI Power WordPress plugin. It provides users with over 100 pre-built templates that can be embedded on their websites to create an interactive experience for their users. Additionally, it allows users to design and create their own prompts using a simple interface. In this article, we will explore the various features of PromptBase and how to use them.
Using the Pre-Built Templates PromptBase offers a wide range of pre-built templates that users can easily search, run, and embed on their websites. Users can search for templates by keyword, category, or author, and once they find a template they like, they can simply click on it to view the details. The details include a shortcode that can be copied and pasted into a WordPress post or page where the prompt will appear. Users can also customize the pre-built templates to suit their needs by clicking on the “customize” button.
Designing Your Own Prompts PromptBase also allows users to design and create their own prompts using a simple interface. To design a prompt, users need to click on the “Design Your Prompt” button in the PromptBase menu. This opens a modal window with four different tabs: Properties, AI Engine, Style, and Frontend.
In the “Properties” tab, users can enter a title for their prompt, select a category, enter the prompt, and add a sample response. The title is mandatory as it will be used to identify the prompt in the PromptBase menu, while the category is also mandatory as it helps to organize the prompts. The prompt is what will be displayed to users when they interact with the prompt, while the sample response is optional and only for the user’s reference.
In the “AI Engine” tab, users can select the GPT model they want to use for their prompt and customize the parameters for the model. Users can choose from a variety of GPT models, including Turbo, Davinci, Curie, Ada, and Babbage. They can also set values for temperature, top p, frequency penalty, presence penalty, and stop sequence. The temperature value determines how creative the prompt will be, the top p value determines how diverse the prompt will be, while the frequency and presence penalty values determine how unique the prompt will be. The stop sequence determines when the prompt will stop generating text.
In the “Style” tab, users can customize the appearance of their prompt by selecting an icon, icon color, and form background color that matches their website’s branding. They can also select a background color for the prompt.
In the “Frontend” tab, users can choose where they want to display the prompt result, either in a text editor or inline. They can also choose to hide the display header, display draft and clear buttons, and display a notice for non-registered users. The header includes the title, category, and icon, while the number of answers feature shows how many answers were generated by the prompt. Users can also choose to display or hide the save as draft and clear buttons.
Token Handling PromptBase also allows users to set token limits by user roles and non-registered users. This ensures that their website’s resources are used efficiently.
Adding Your Own Content to the ChatGPt Made Easy
Embeddings is a powerful feature of the GPT AI Power WordPress plugin that utilizes OpenAI’s text embeddings technology. The plugin provides a semantic search engine, KnowledgeBase, and chatbot functionality by utilizing the ADA model with Pinecone integration.
To use embeddings, the first step is to create a Pinecone account. Pinecone is a vector database that allows you to store and query vectors. You can think of Pinecone as a long-term external memory for your bot. Once you have created an account, you need to copy your Pinecone API key and paste it into the Pinecone API Key field under the Settings tab.
Under Content Builder, you can create embeddings for all your website content. You can enter text strings that you want to embed and select the content type that you want to use. There are several ready-to-use templates such as Free Text, FAQ, KnowledgeBase, Product, Woocommerce Product, URL, and Company Profile. Once you have entered all the required information, click on the Save button, and your entries will be listed under the Entries tab.
Under the Entries tab, you can view the text strings that you have entered along with the spent tokens, estimated cost, type of text string, and date. You can also delete an index by clicking on the Delete button. This will delete your content from Pinecone.
Index Builder is where you can create embeddings for all your website content. To use the Index Builder, you need to set up a Cron Job on your server. Once you have set up the Cron Job, you can use the Index Builder to index your website content.
In addition to the Index Builder, the GPT AI Power plugin also includes an “Instant Embeddings” feature. This allows users to create embeddings for individual posts, pages, or products without needing to set up a Cron Job or wait for the Index Builder to run.
To use Instant Embeddings, simply go to the post, page, or product you want to create embeddings for and select the checkbox next to “Instant Embedding”. The plugin will create embeddings for the selected content.
Fine-Tune Your Content with GPT AI Power
One of our plugin’s standout features is the AI Training module, which allows you to fine-tune a model for your specific application. Fine-tuning involves customizing a pre-existing model by feeding it with your own data. The AI Training module offers three ways to upload your data: Data Upload, Manual Entry, and Data Converter.
With Data Upload, you can upload your dataset directly from your computer, as long as it’s in the *.jsonl format and not exceeding 100MB per file. There are four fields that need to be filled in the Datasets tab, including choosing the file, selecting the purpose (currently only Fine-tune is available), selecting the model base from a dropdown list (ada, babbage, curie, or davinci), and optionally entering a custom model name. Once the file is uploaded, you can perform various actions on it, such as creating a fine-tune request, retrieving content, or deleting the file.
The Manual Entry method allows you to manually enter your data. You can enter your product data, for example, by providing prompt and completion pairs in JSONL format. Once you have entered all your data, you can select a model base, give a custom name (optional), and click on “Upload.”
The Data Converter tab offers three different options: Convert Your Posts, Convert Your Pages, and Convert Your WooCommerce Products. This tool allows you to convert your entire database into a JSONL file. Please note that conversion may take longer if you have a huge database, and your website may become unresponsive if resources are insufficient.
Once you have uploaded your dataset, you can create a fine-tune request. The important step before creating your fine-tune request is to either create a new model or select an existing model from the dropdown list. Creating multiple fine-tune requests for the same dataset is possible, as you can create a fine-tune request using different model bases or models. This way, you can compare the results and choose the best model for your use case. If you have a huge dataset, you can split it into multiple files and create a fine-tune request for each file using the same model base.
To view the fine-tune requests, click on the “View Fine-Tunes” button, which displays all the fine-tune requests you have created. You can view information such as the fine-tune request’s ID, creation date, model, and status. The “Training” column allows you to perform various actions on the fine-tune requests, such as viewing the fine-tune request’s details, viewing the fine-tuned model, and deleting the fine-tune request. You can also view the fine-tune request’s events, hyper-parameters, result files, and training files.
Once you have a complete fine-tune request, you can use the fine-tuned model with ChatBox in your website. To do this, go to the plugin’s settings page and click on the ChatGPT tab. Your fine-tuned model should now be available in the dropdown list. Select it and click on “Save Changes.” If you don’t see your fine-tuned model, make sure that the fine-tune request is complete and click on “Sync Models” link to get the latest models. Ask your ChatBox a question, and you should see that the ChatBox is now using the fine-tuned model.
Boost Your WooCommerce Product Listings with GPT
The WooCommerce Product Writer module in GPT AI Power is a powerful tool that can help you create optimized and engaging product listings for your WooCommerce website. This feature is designed to streamline the process of creating product listings by using the advanced capabilities of GPT models.
To use the WooCommerce Product Writer module, you must have the WooCommerce plugin installed and enabled on your website. Once you have done this, you can follow these simple steps to generate optimized content for your product listings:
Navigate to WooCommerce > Add New Product: This will take you to the WooCommerce product creation page.
Scroll down to the “GPT Product Writer” section: This section is added by our plugin and is where you can select the features you wish to use for your product listing.
Select the checkboxes for the features you wish to use: You can generate title, description, short description, meta description and tags. Our plugin uses advanced GPT models to generate these features based on the product details you provide.
Click on the “Generate” button: This will generate optimized content for your product listing based on the selected features.
Review and modify the generated content as needed: Our plugin generates content based on the product details you provide. You can review and edit the generated content as needed to ensure that it accurately reflects your product.
Click on the “Save Draft” button: This will save your product listing with the generated content.
One of the best features of the WooCommerce Product Writer module is that it integrates seamlessly with popular SEO plugins like Rank Math, Yoast SEO, and All In One SEO. If you are using any of these SEO plugins, our plugin will automatically detect them and update their meta description field with the generated content. This can save you a lot of time and effort in optimizing your product listings for search engines.
Additionally, our plugin allows you to use your own custom prompts instead of the built-in prompts. You can change the prompts under the Settings > Custom Prompts section. This gives you complete control over the content that is generated for your product listings.
In summary, the WooCommerce Product Writer module in GPT AI Power is a powerful tool that can save you time and effort in creating optimized and engaging product listings for your WooCommerce website. With advanced GPT models, seamless integration with popular SEO plugins, and support for custom prompts, our plugin is the perfect tool for anyone looking to streamline their product listing creation process.
Get Perfect Titles in a Snap!
Title Suggester is a powerful tool in our GPT AI Power plugin that can help you generate title suggestions for your WordPress website. Whether you’re creating a blog post, a page, or a WooCommerce product, our Title Suggester can make your job easier by offering 5 unique and engaging title suggestions for your content.
Here’s how to use the Title Suggester for each content type:
For Posts: Navigate to Posts > All Posts from your WordPress dashboard. Hover over the post you want to generate title suggestions for and click on the “Suggest Title” button. A popup will appear with 5 different title suggestions. Choose the one that you like the most, and click on the “Use This” button to update your post’s title.
For Pages: Navigate to Pages > All Pages from your WordPress dashboard. Hover over the page you want to generate title suggestions for and click on the “Suggest Title” button. A popup will appear with 5 different title suggestions. Choose the one that you like the most, and click on the “Use This” button to update your page’s title.
For WooCommerce Products: Navigate to Products > All Products from your WordPress dashboard. Hover over the product you want to generate title suggestions for and click on the “Suggest Title” button. A popup will appear with 5 different title suggestions. Choose the one that you like the most, and click on the “Use This” button to update your product’s title.
With the Title Suggester, you can easily optimize your content for search engines and attract more visitors to your website.
Convert Audio to Text with GPT AI Power
GPT AI Power offers an Audio Converter feature that allows you to easily convert audio files into text format using OpenAI’s Whisper model. This state-of-the-art open source large-v2 model ensures accurate transcription and translation of audio files at a cost of $0.006 per minute of audio.
The Audio Converter feature supports various audio file types, including mp3, mp4, mpeg, mpga, m4a, wav, and webm, and has a file size limit of 25 MB.
The Transcription option supports 38 languages, including Afrikaans, Arabic, Chinese, French, German, Hindi, Italian, Japanese, Korean, Russian, Spanish, and many more. Meanwhile, the Translation option allows you to convert audio files from any language into English only.
You can also customize the output using the available options, such as selecting the model, adding a prompt, and choosing the output format. The Temperature option allows you to control the output’s randomness, while the “Set as Default” button lets you set the default options for the conversion.
Speech to Post
Another feature of GPT AI Power is the Speech to Post, which enables you to convert your speech into a WordPress post with one click. The Audio Converter feature is used here as well, with a hard-coded parameter set to Turbo, with a maximum token limit of 2000, temperature of 0.7, top p of 1, and frequency and presence penalty of 0.01. This feature is especially helpful for content creators who prefer speaking over typing and for those who need to generate posts quickly.
Finally, the plugin has a Logs feature that allows you to view the logs of the audio files that you have converted, with six fields: ID, Title, Format, Date, Duration, and Action. You can search for a specific audio file using the search box and delete or download it from the Action field.
With GPT AI Power’s Whisper integration, you can effortlessly convert audio files into text format and generate WordPress posts from your speech, saving you time and effort while ensuring accurate results.
Revolutionize Your Website’s Search with SearchGPT
Our plugin, GPT AI Power, offers a powerful semantic search feature called SearchGPT that allows you to enhance the search functionality of your WordPress website. This feature uses OpenAI embeddings and Pinecone vector database integration to provide a highly relevant and accurate semantic search experience for your users.
To use the SearchGPT feature, you must first have a Pinecone API key entered under the “Embeddings-Settings” page. Once you have done this, you can simply copy the shortcode
Customization is key with SearchGPT, and you can easily customize the search box and results from the Settings → SearchGPT page. You can customize the placeholder message, font size, font color, border color, background color, width, and height for the search box. You can also customize the results, including the number of nearest results (from 1 to 5), font size, font color, background color, and in-progress background color.
When a user enters a search query, the plugin uses OpenAI embeddings to convert the query into a vector representation. The vector representation is then compared to the vectors of the content on your website using cosine similarity, which measures the angle between two vectors. The content with the highest cosine similarity score is returned as the most relevant result.
One of the benefits of using semantic search is that it goes beyond just matching keywords. Instead, it understands the intent behind the search query and returns results that are related to that intent. This means that even if a user misspells a word or uses synonyms, the search results will still be relevant.
In addition to its powerful search capabilities, SearchGPT is also easy to use and can be integrated seamlessly into your WordPress website. With its customizable options and accurate results, it can help improve the user experience of your website and make it easier for users to find what they are looking for.
Overall, SearchGPT is a valuable addition to any WordPress website that wants to improve its search functionality and provide users with a better search experience. Its use of OpenAI embeddings and Pinecone vector database integration ensures that it provides highly relevant and accurate search results, while its customization options make it easy to integrate into any website.
GPT AI Power Comparison Tool
The Comparison Tool is a powerful feature of the GPT AI Power WordPress plugin that allows you to compare the performance of different GPT models. With this tool, you can test different models using pre-built prompts or your own custom prompts and see how they perform in terms of token usage, duration, estimated cost, and number of words.
To use the Comparison Tool, simply go to the “Comparison” tab in the plugin and select the models you want to compare. You can add up to 10 different models with different parameters and make tests using the “Add Model” button.
The Comparison Tool supports several pre-built prompts that you can use to test the models. You can also create your own custom prompts to test the models based on your specific needs.
The tool supports several GPT models, including Davinci, Ada, Babbage, Curie, GPT-3.5, GPT-4, GPT-4-32k, and your own custom models. This allows you to test and compare different models and choose the one that best fits your needs.
Once you have added the models and prompts, simply click the “Generate” button to run the test. The tool will generate response using each model and compare the results based on token usage, duration, estimated cost, and number of words. The results will be displayed in a table, allowing you to easily compare the performance of each model.
In addition to the table results, the tool also provides a detailed breakdown of the token usage, duration, estimated cost, and number of words for each model. This allows you to analyze the results and make an informed decision on which model to use for your specific needs.